
Synology NAS — Google Workspace Backup Configuration SOP
1. Purpose
This SOP documents the process for configuring a Synology NAS device to perform automated backups of a client's Google Workspace (GWS) domain, including all user accounts, Shared Drives, Gmail, Contacts, and Calendar data. It covers Google Cloud project setup, service account configuration, Domain-Wide Delegation, Synology Active Backup installation, shared folder configuration, and backup task creation.
2. Scope
This procedure applies to:
- Any DTC-managed client with a Google Workspace domain requiring NAS-based backup
- Synology NAS devices running DSM 7.x or later
- Environments where Active Backup for Google Workspace is the designated backup solution
- Clients with CMMC, cyber insurance, or compliance requirements mandating data-at-rest backup and encryption
3. Prerequisites
3.1 Access Requirements
- ZeroTier VPN access to the client's lab/office network
- DSM admin credentials for the target Synology NAS
- Google Workspace Super Admin credentials for the client domain
- Google Cloud Console access (Organization or Project level)
- Access to the client's password vault (IT Glue or equivalent)
3.2 Tools & Accounts
- Synology NAS running DSM 7.x with Active Backup for Google Workspace available in Package Center
- Google Cloud Console: console.cloud.google.com
- Google Admin Console: admin.google.com
- IT Glue (or designated password vault) for credential storage
3.3 Client-Specific Reference Information
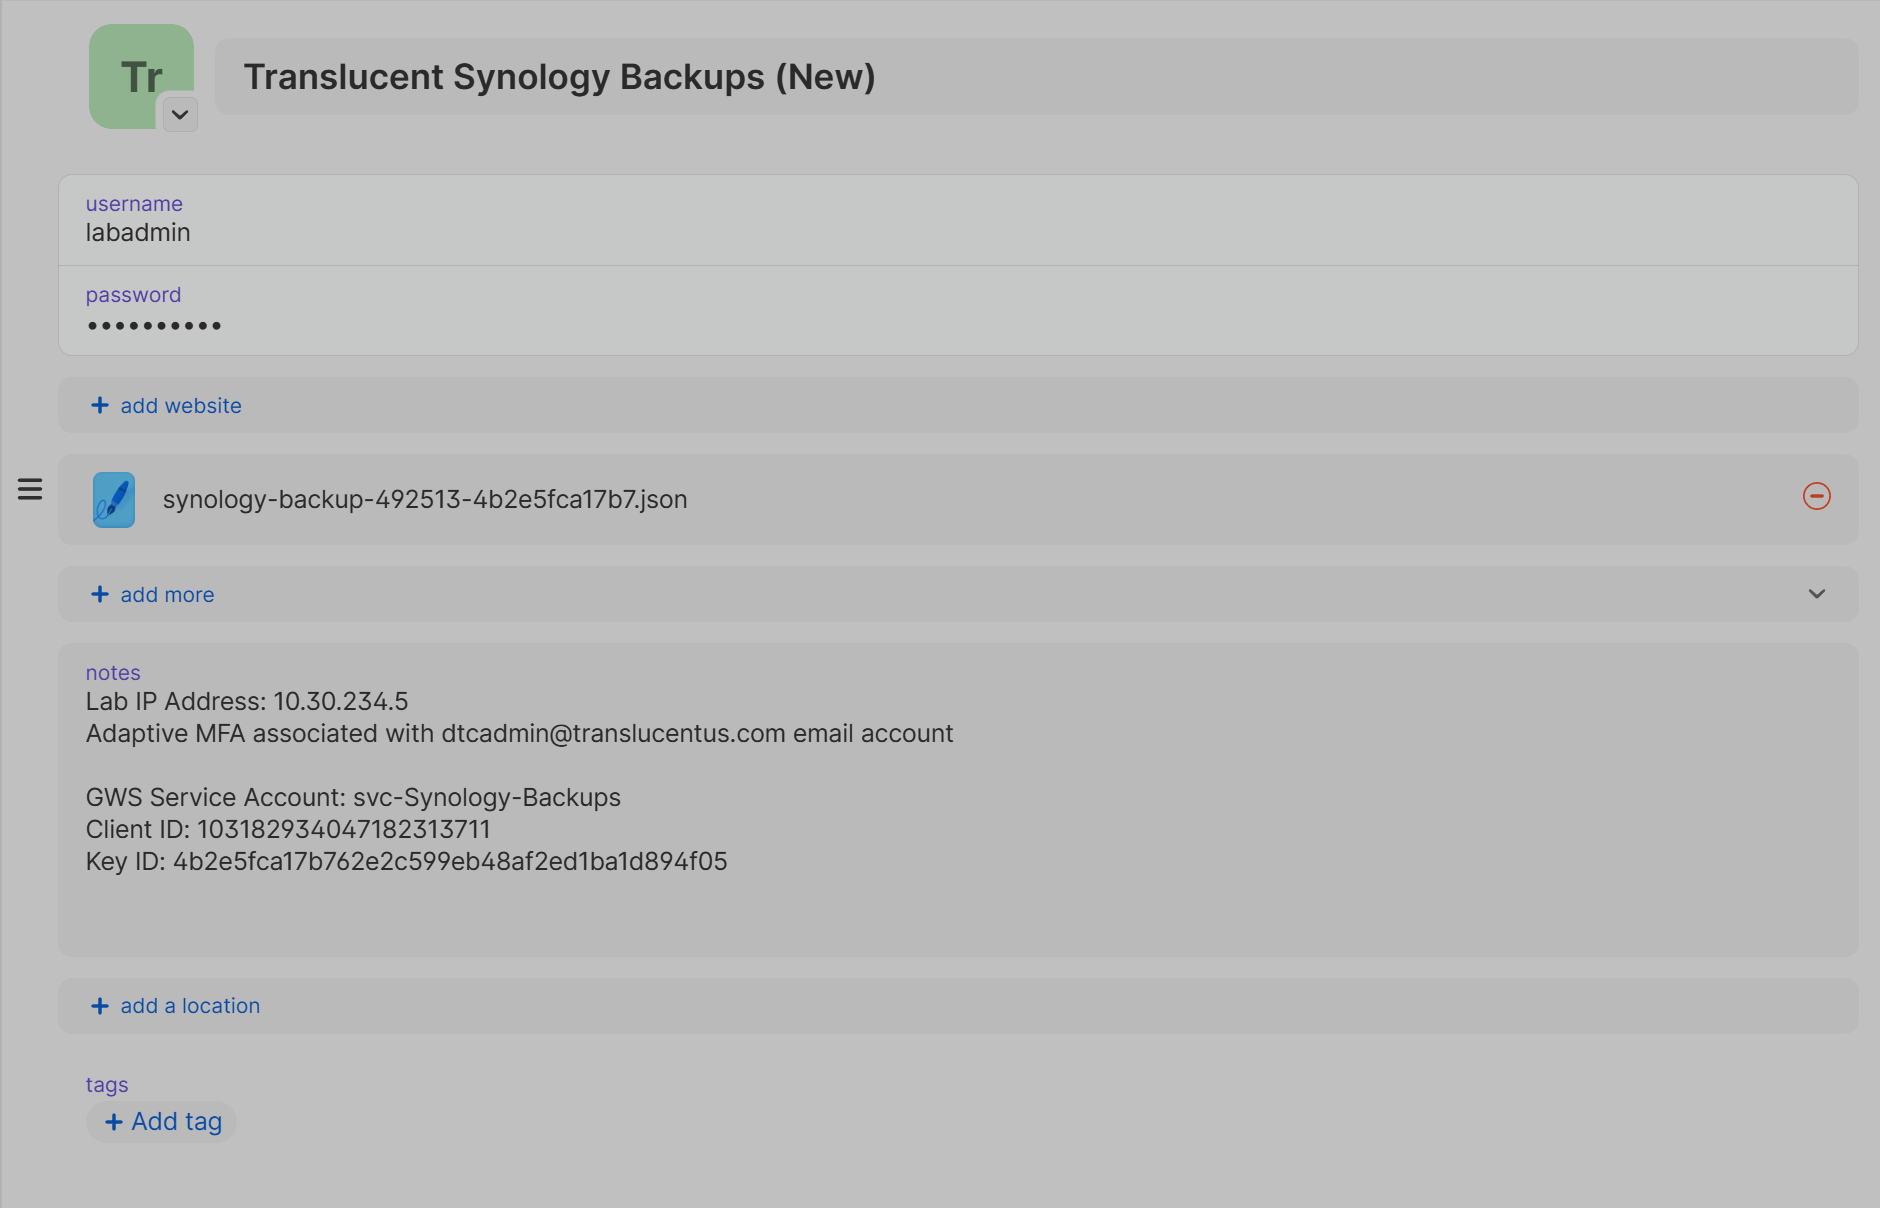
Credential locations (Translucent):
- Service account authorization key (JSON) and Client ID — 1Password, Synology Backup entry. This is the credential Active Backup uses to authenticate to the Google Workspace domain. If it is missing, deleted, or rejected, the backup task fails with "Invalid service key" and reports 0 KB across all services. Re-upload it via the task's Reauthorize link to restore.
- Shared folder / disk encryption key export — IT Glue, Synology Backup entry.
4. Security Considerations
- Service account operates with Domain-Wide Delegation (DWD) — full read access to all user Drive, Gmail, Calendar, and Contacts data
- Shared folder encryption uses AES-256; the machine key is stored on the NAS hardware
- Auto-mount on boot protects against drive-removal attacks but does not protect against full-device theft
- Export and store the encryption key file in IT Glue immediately after enabling encryption
- The impersonation account (dtcadmin@translucentus.com) must remain a Super Admin for DWD to function
5. Procedure
Phase 1: Initial NAS Access & Preparation
- Step 1: Connect to the client network via ZeroTier VPN.
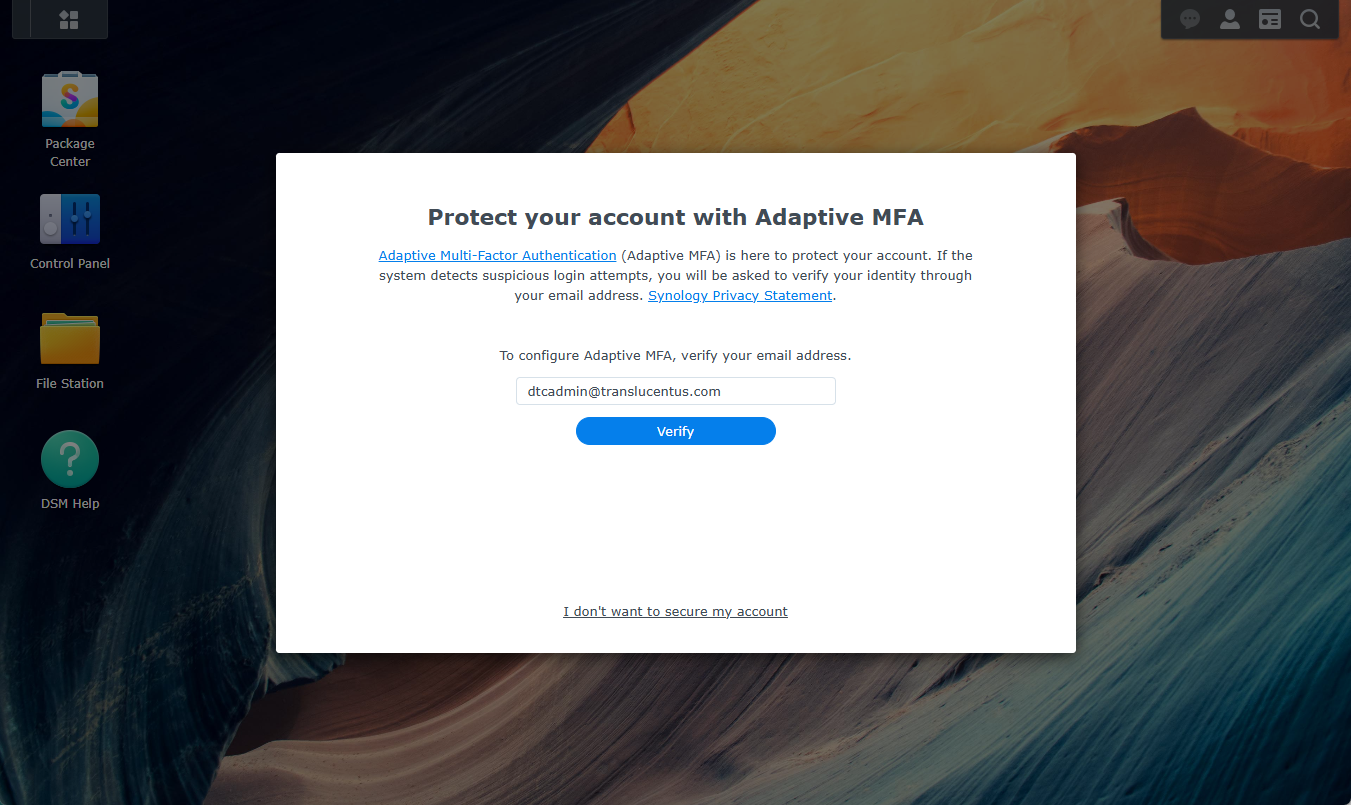
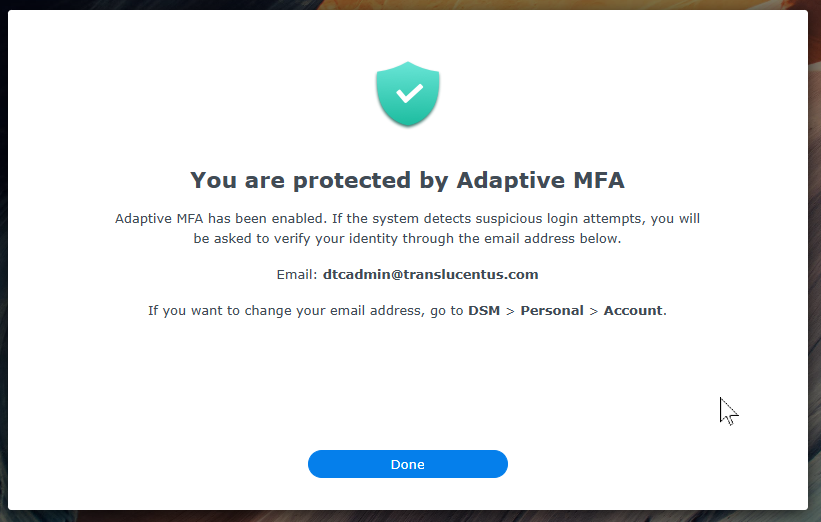
- Step 4: Configure Adaptive MFA on the admin account. Verify the recovery email is set to dtcadmin@translucentus.com.
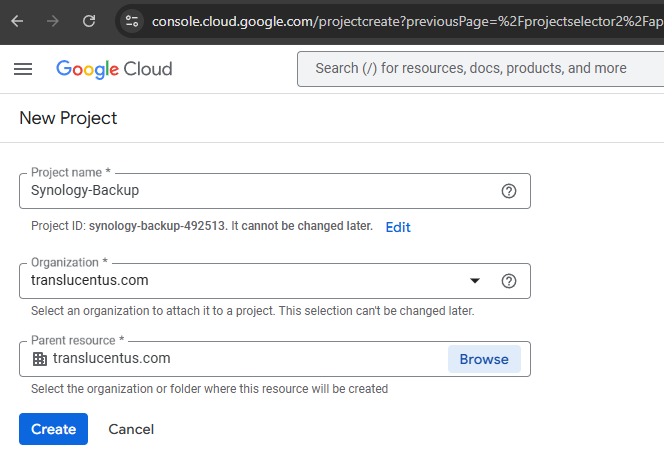
Phase 2: Google Cloud Project & API Setup
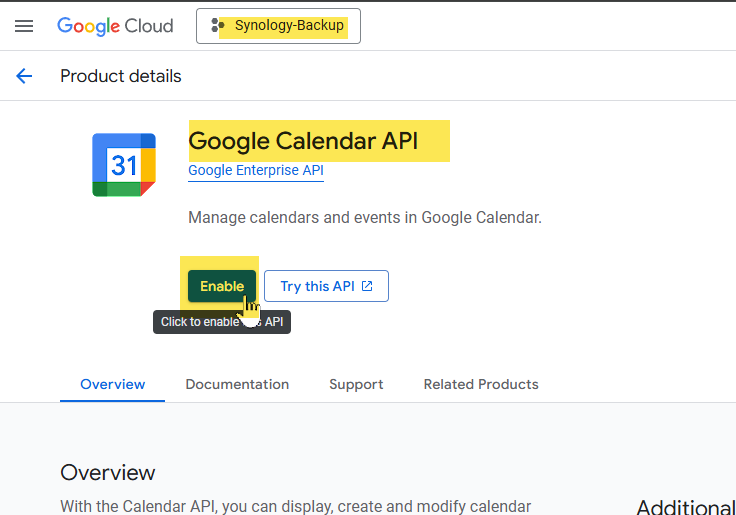
- Step 3: With the new project selected, navigate to APIs & Services > Library and enable the following APIs:
- Admin SDK API
- Gmail API
- Google Drive API
- Google Calendar API
- Google People API
Phase 3: Service Account & Key Creation
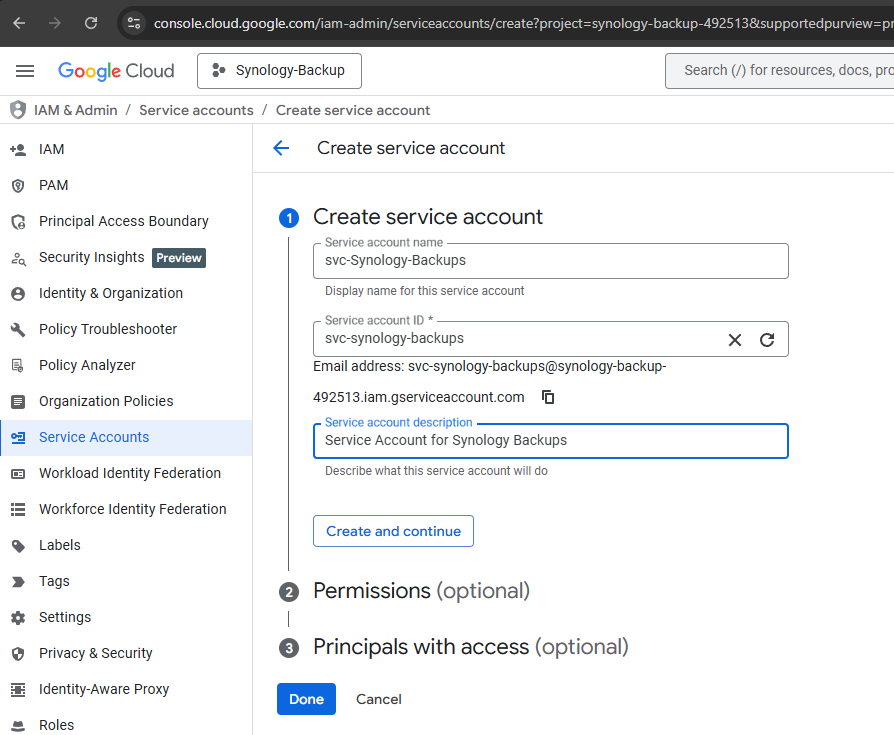
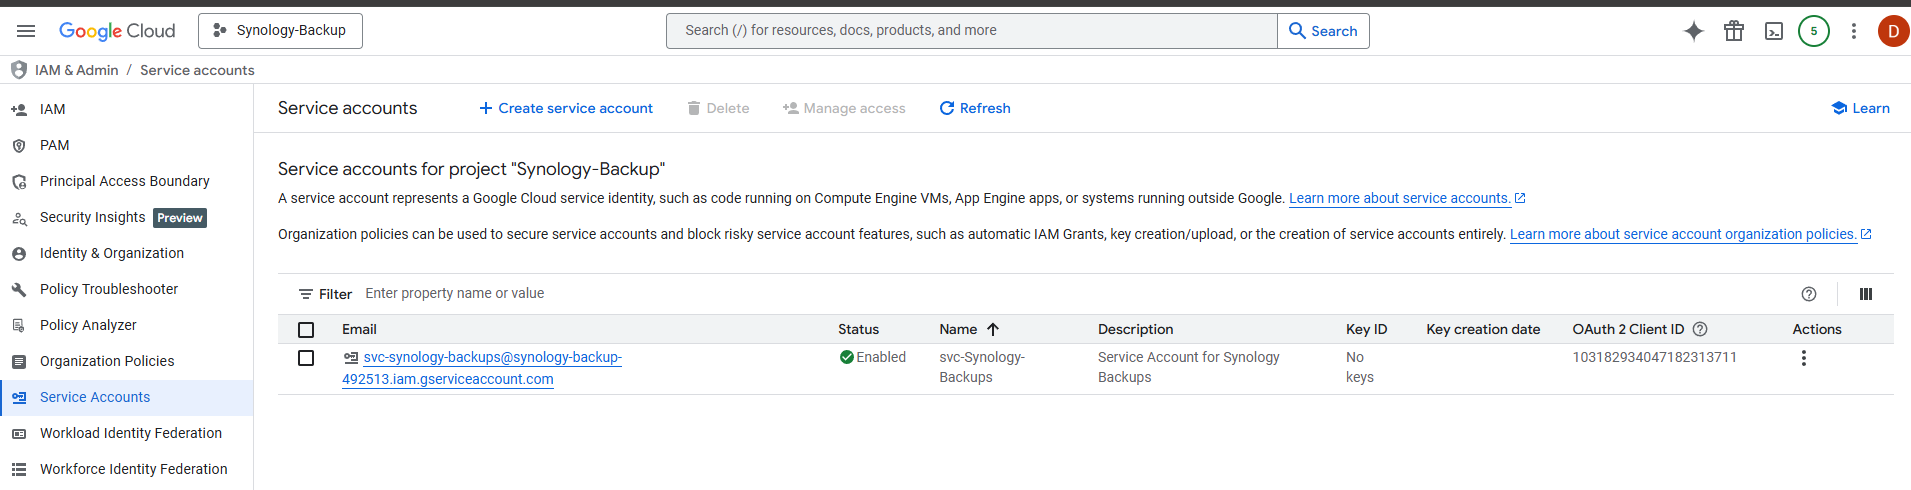
- Step 1: In the Synology-Backup project, navigate to IAM & Admin > Service Accounts.
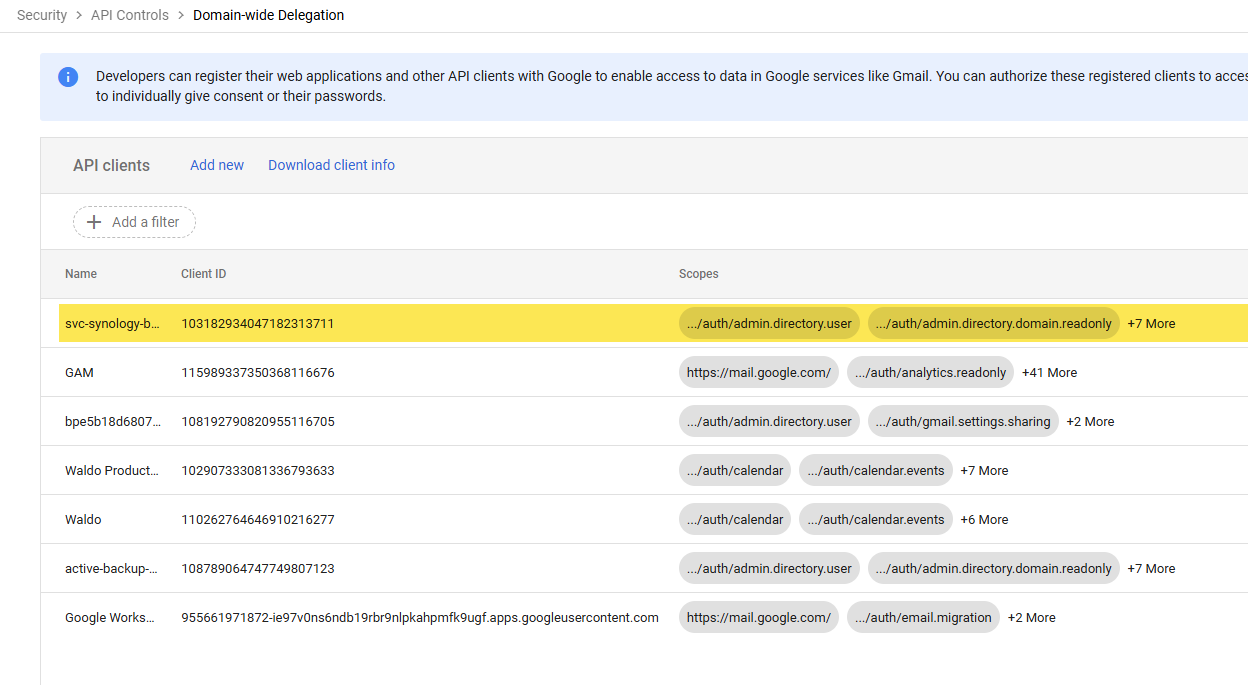
- Step 2: Click Create Service Account. Name it svc-synology-backups. No IAM roles are required — click through to finish.
- Step 3: Open the new service account and navigate to the Keys tab.
- Step 4: Click Add Key > Create New Key > JSON. Download the key file.
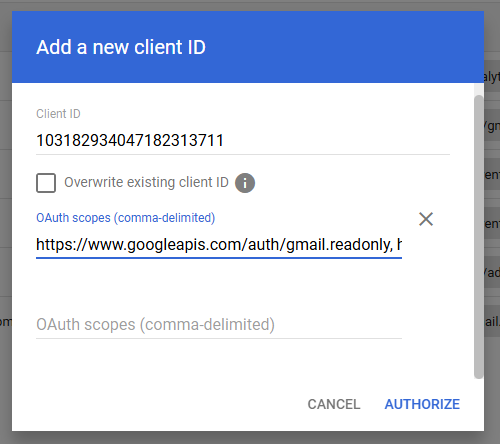
- Step 5: On the service account detail page, copy the Unique ID (Client ID).
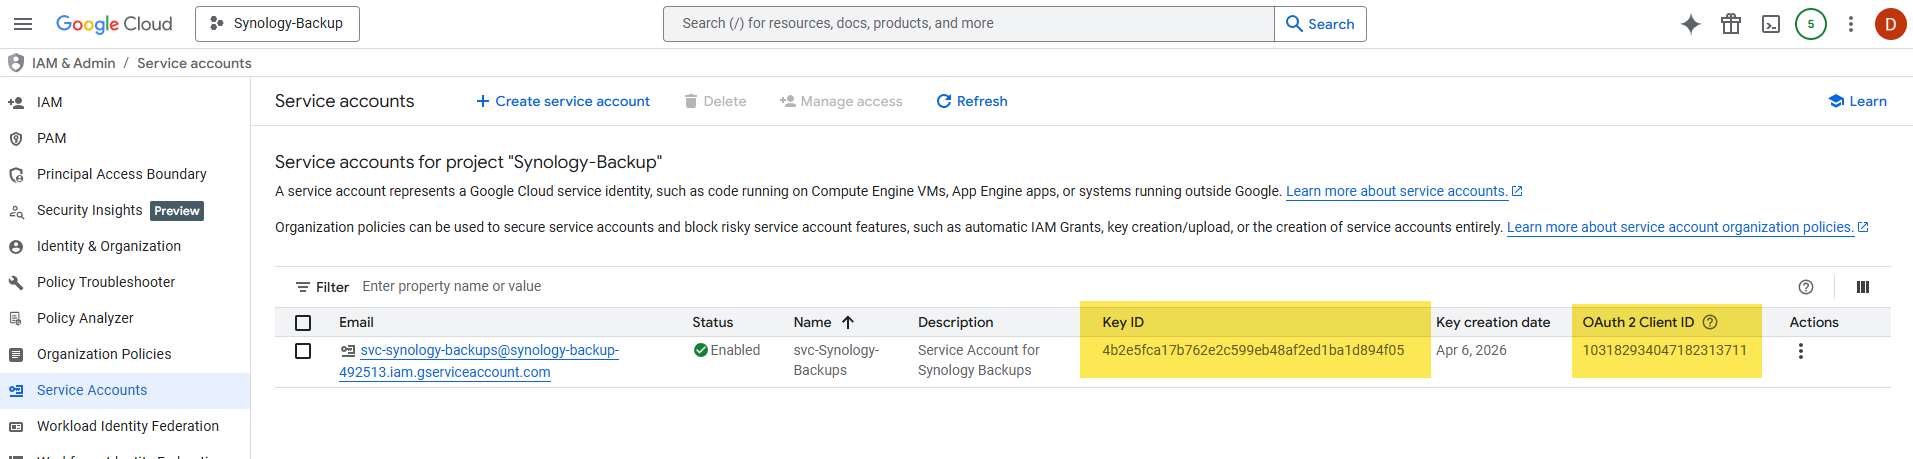
- Step 6: Store the Client ID and the JSON key file in the client's 1Password vault under the Synology Backup entry. (The shared folder encryption key is stored separately in IT Glue — see Phase 4, Step 6.)
Phase 4: Configure Synology Shared Folder

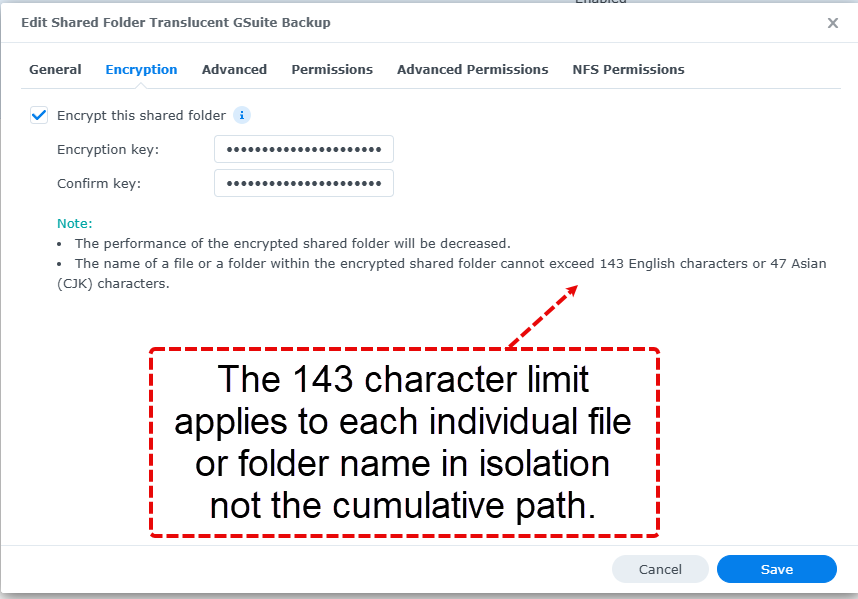
- Step 3: On the Encryption tab, check Encrypt this shared folder and set a strong encryption key.
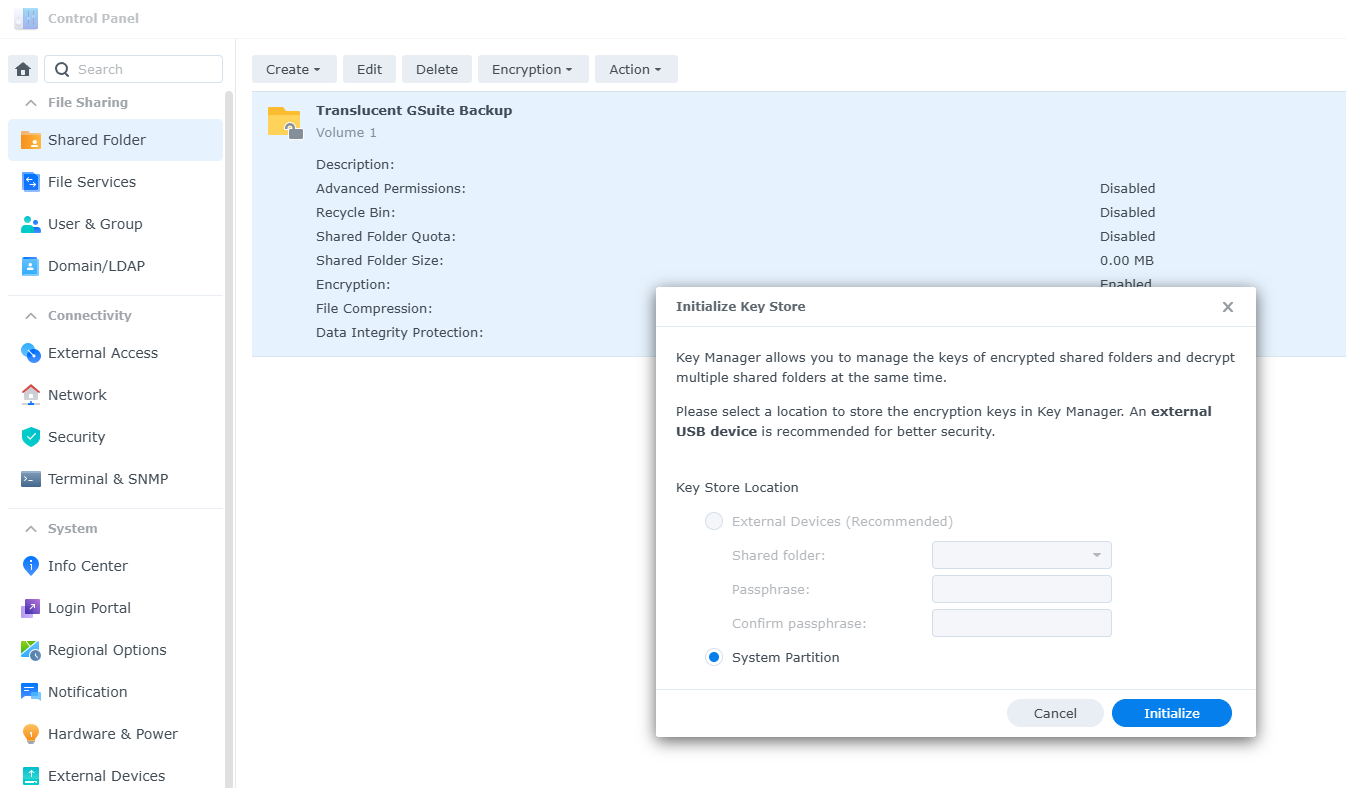
- Step 4: Save the folder. After saving, navigate to Control Panel > Shared Folder > Encryption > Key Manager.
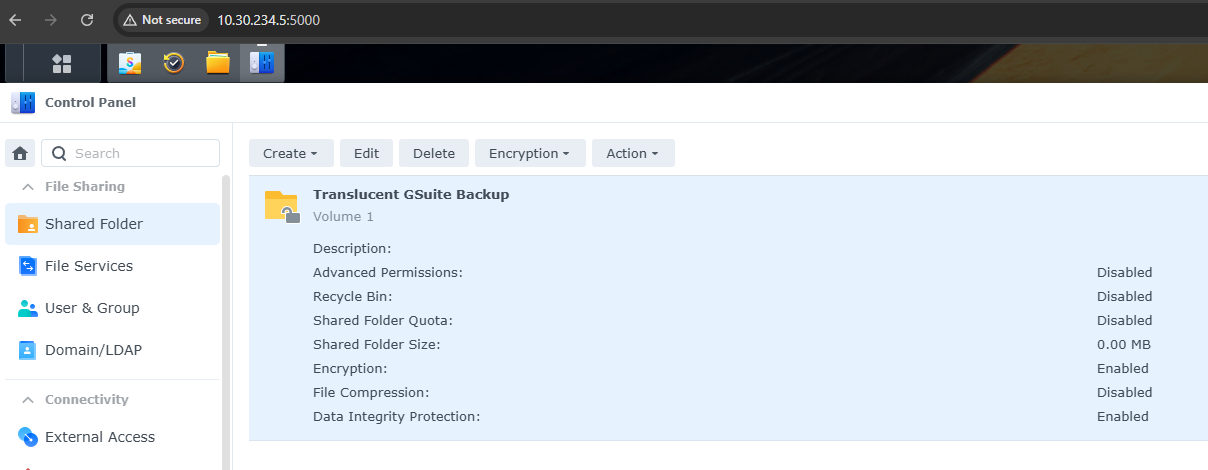
- Step 5: Confirm the shared folder shows Status: Mount, Cypher: Machine key, and Automount is checked.

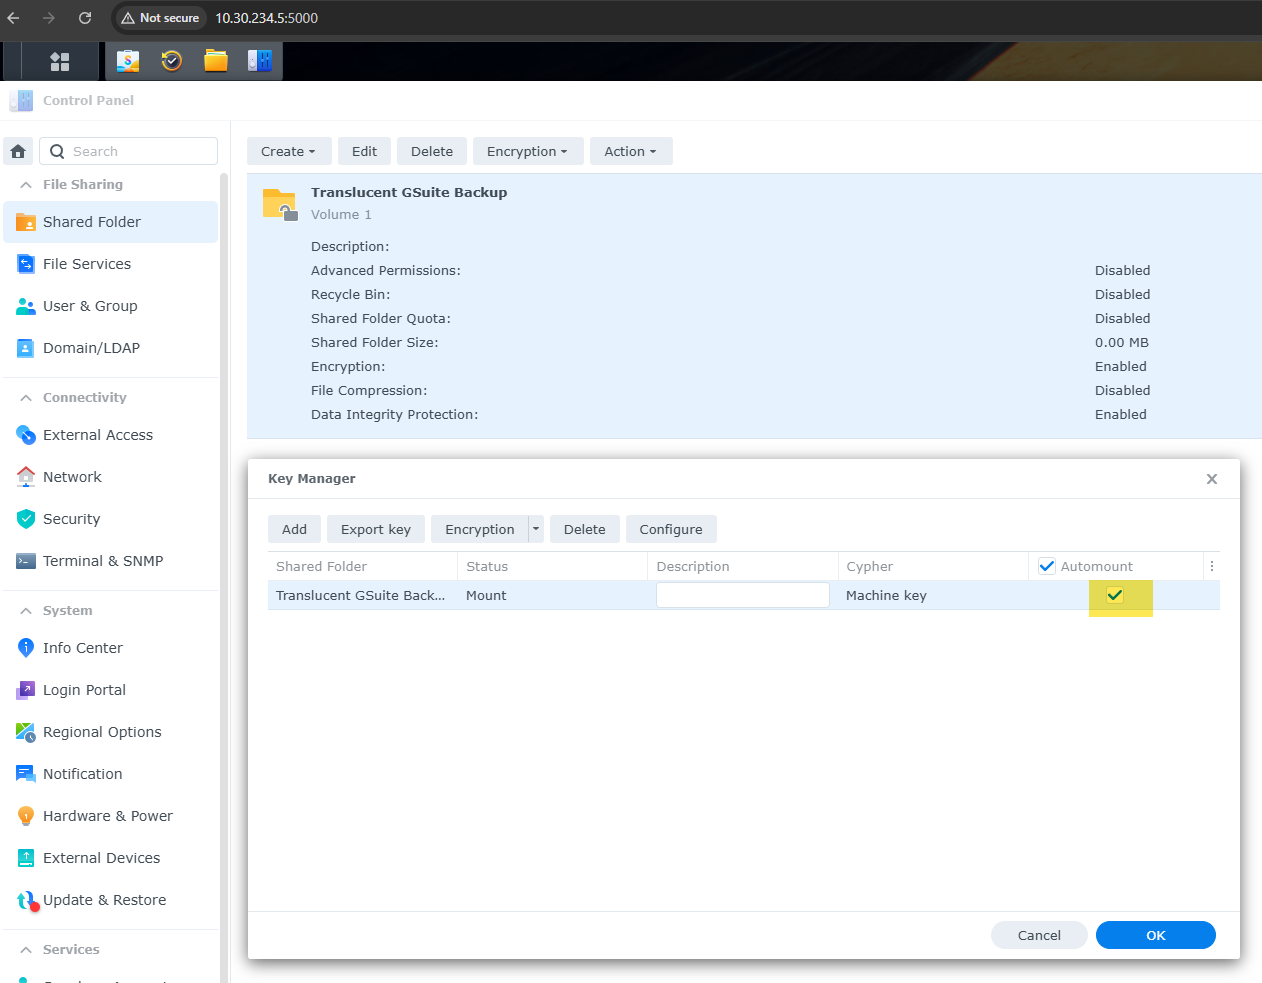
- Step 6: Click Export Key and save the exported key file to IT Glue under the client's Synology Backup entry.
Phase 5: Configure Domain-Wide Delegation
https://www.googleapis.com/auth/admin.directory.user, https://www.googleapis.com/auth/admin.directory.domain.readonly, https://www.googleapis.com/auth/drive, https://mail.google.com/, https://www.googleapis.com/auth/calendar, https://www.googleapis.com/auth/contacts, https://www.googleapis.com/auth/contacts.other.readonly, http://sites.google.com/feeds, https://www.googleapis.com/auth/tasks
Phase 6: Install & Configure Active Backup for Google Workspace
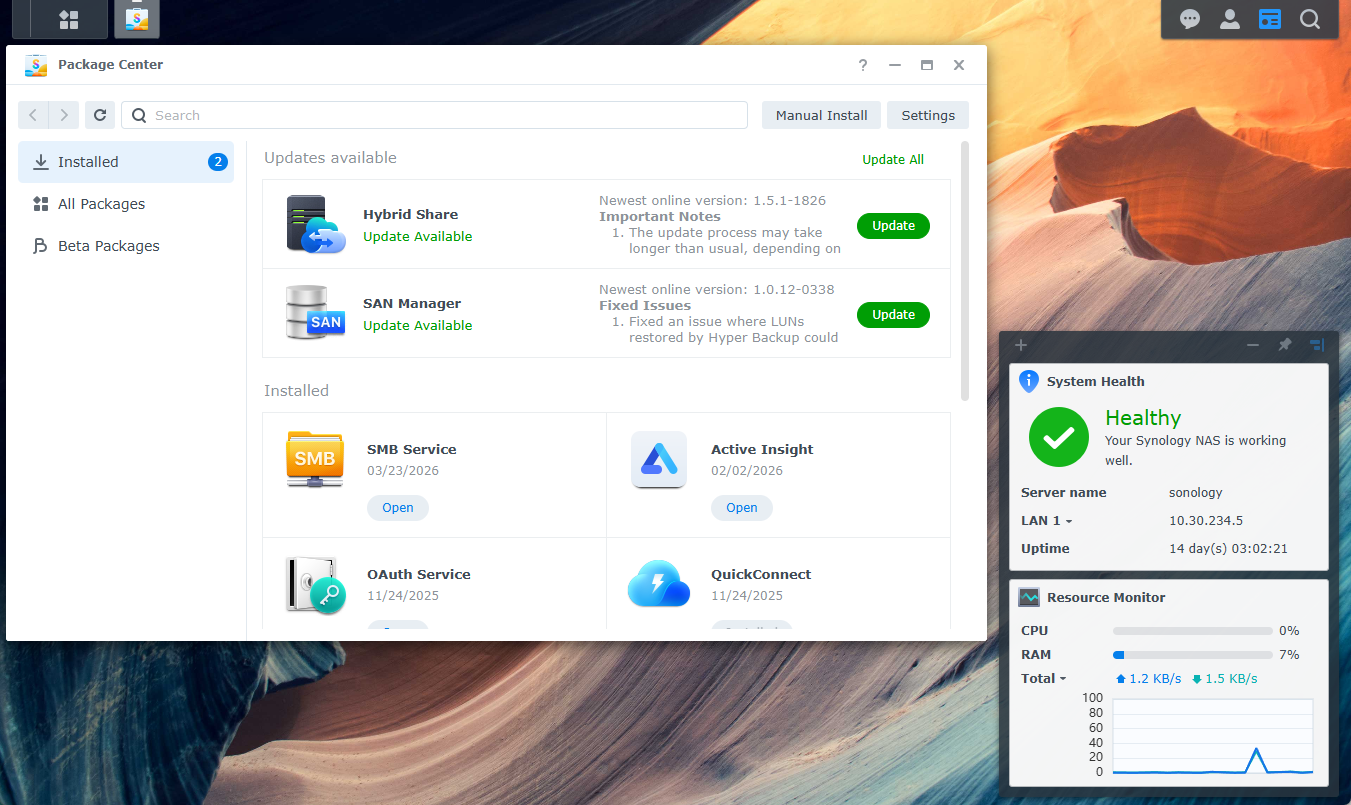
- Step 1: In DSM, open Package Center and search for Active Backup for Google Workspace. Install it.
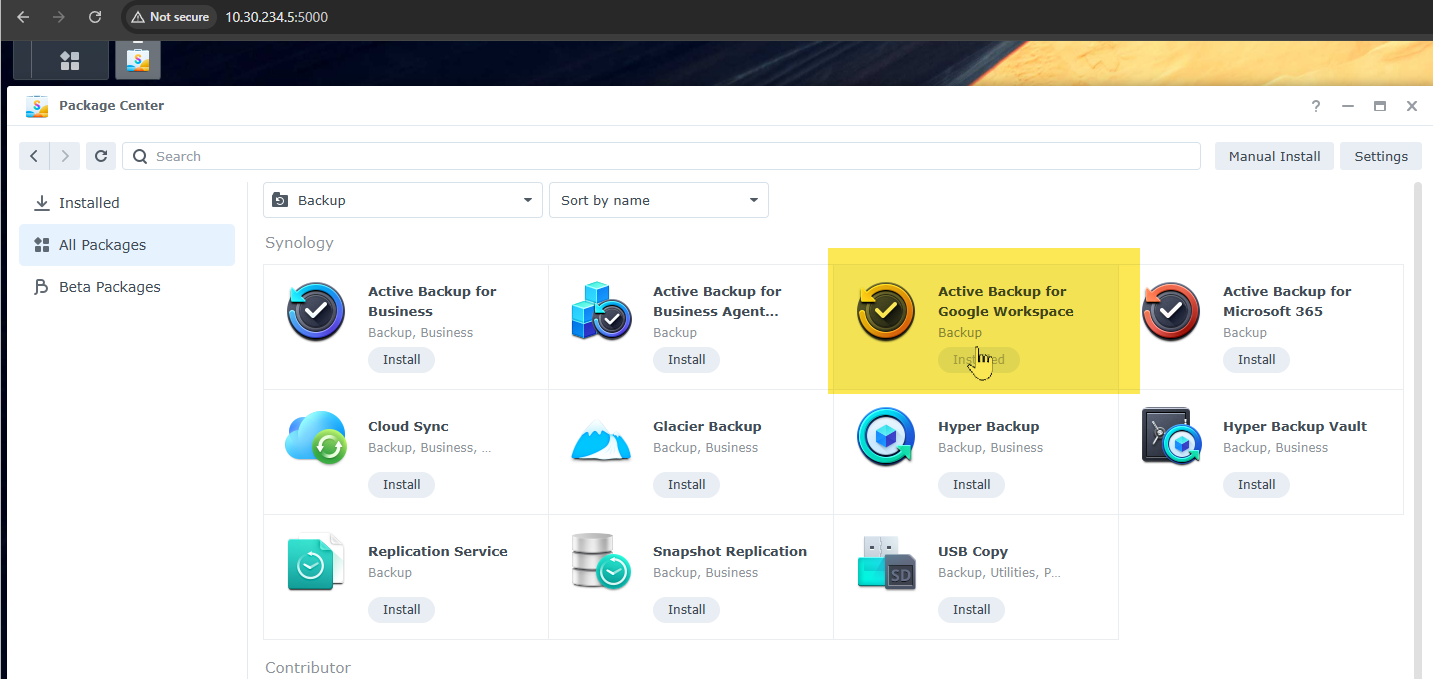
- Step 2: Open the Active Backup for Google Workspace application.
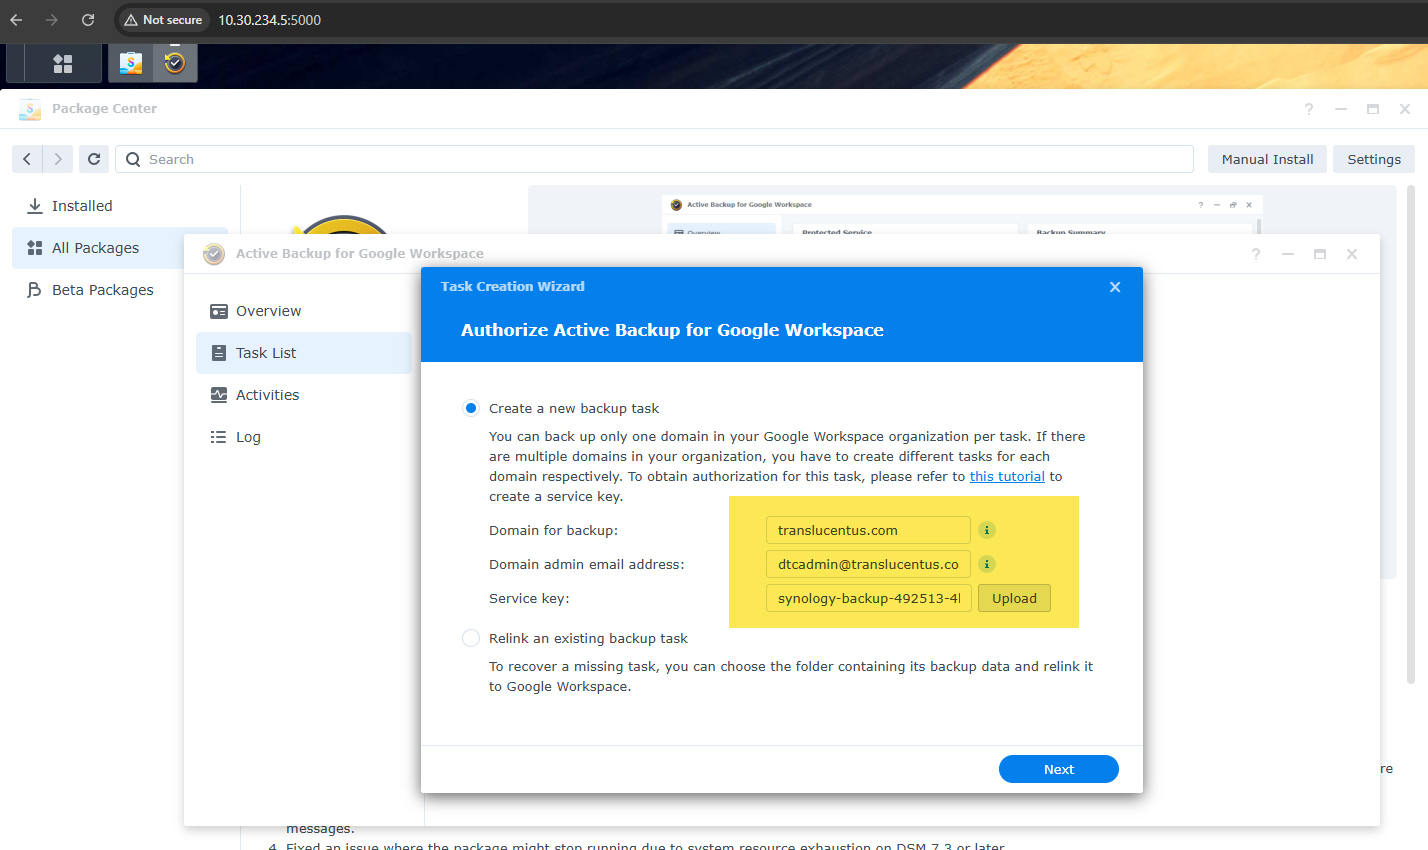
- Step 3: Click Add Google Workspace Account and complete the following:
- Domain: translucentus.com
- Upload the JSON key file saved in 1Password (Synology Backup entry)
- Super Admin impersonation account: dtcadmin@translucentus.com
- Step 4: Click Authenticate. The application will enumerate all users and Shared Drives in the domain.
Phase 7: Create Backup Task
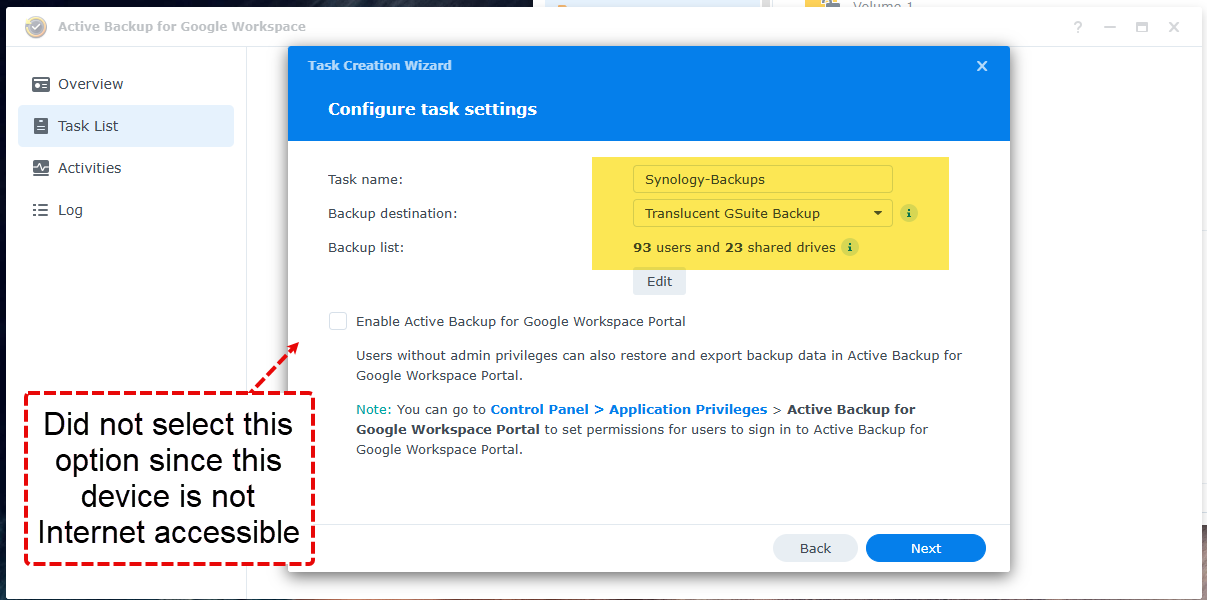
- Step 1: In Active Backup for Google Workspace, navigate to Task List and click Create Task.
- Step 2: Configure the task scope:
- Users: All users (or select specific users if scoped)
- Shared Drives: Select All
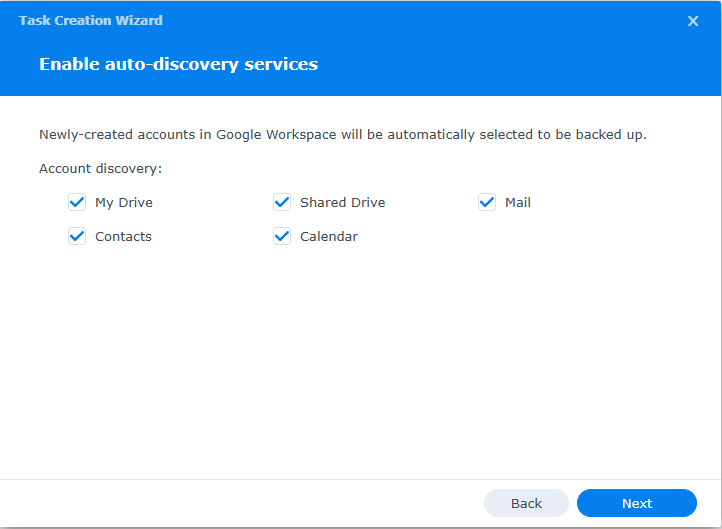
- Step 3: Select data types to include: Drive, Gmail, Contacts, Calendar.
- Step 4: Set the destination to the Translucent GSuite Backup shared folder.
- Step 5: Set the schedule: Daily, during off-hours (recommend 11:00 PM – 4:00 AM local time).
- Step 6: Configure retention policy with versioning enabled (retain at minimum 30 days of versions).
- Step 7: Save the task and immediately run it manually to validate the first backup.


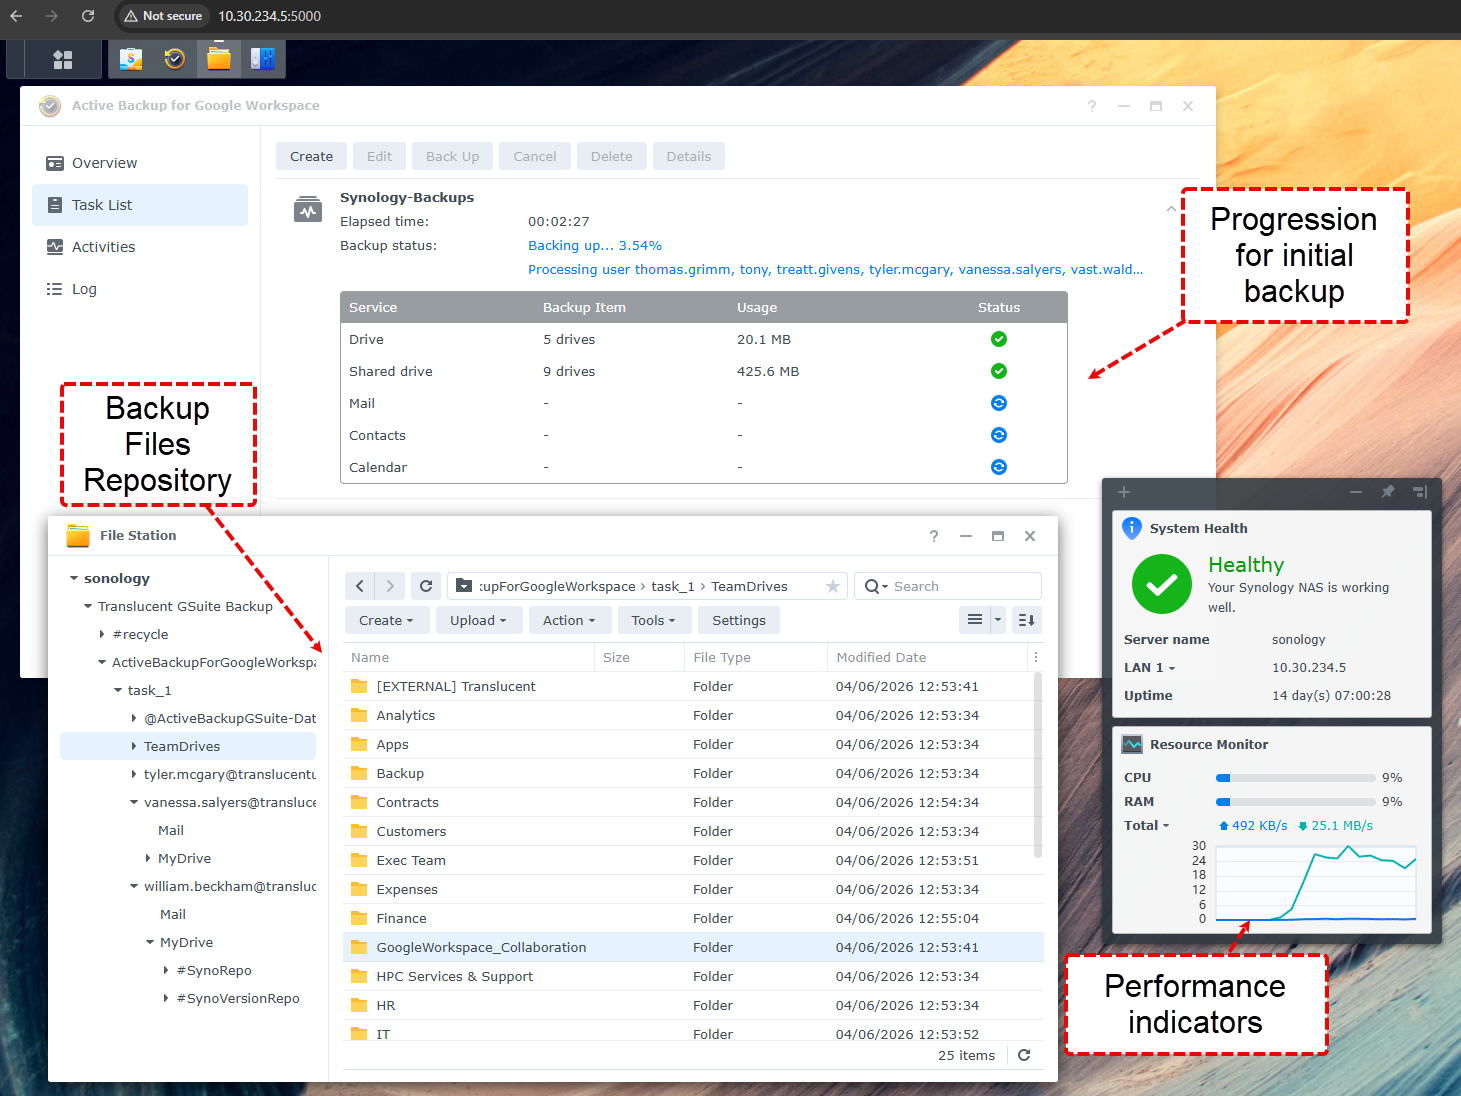
6. Verification & Validation
After the first backup completes, perform the following validation steps:
7. OAuth Scope Reference
The following scopes are configured under Domain-Wide Delegation for the service account:
8. Troubleshooting
9. Document Control
- 1Password: Translucent Services — Synology Backup entry (service account JSON key, Client ID)
- IT Glue: Translucent Services — Synology Backup entry (shared folder encryption key export)
- Google Cloud Console: Synology-Backup project — Service Accounts
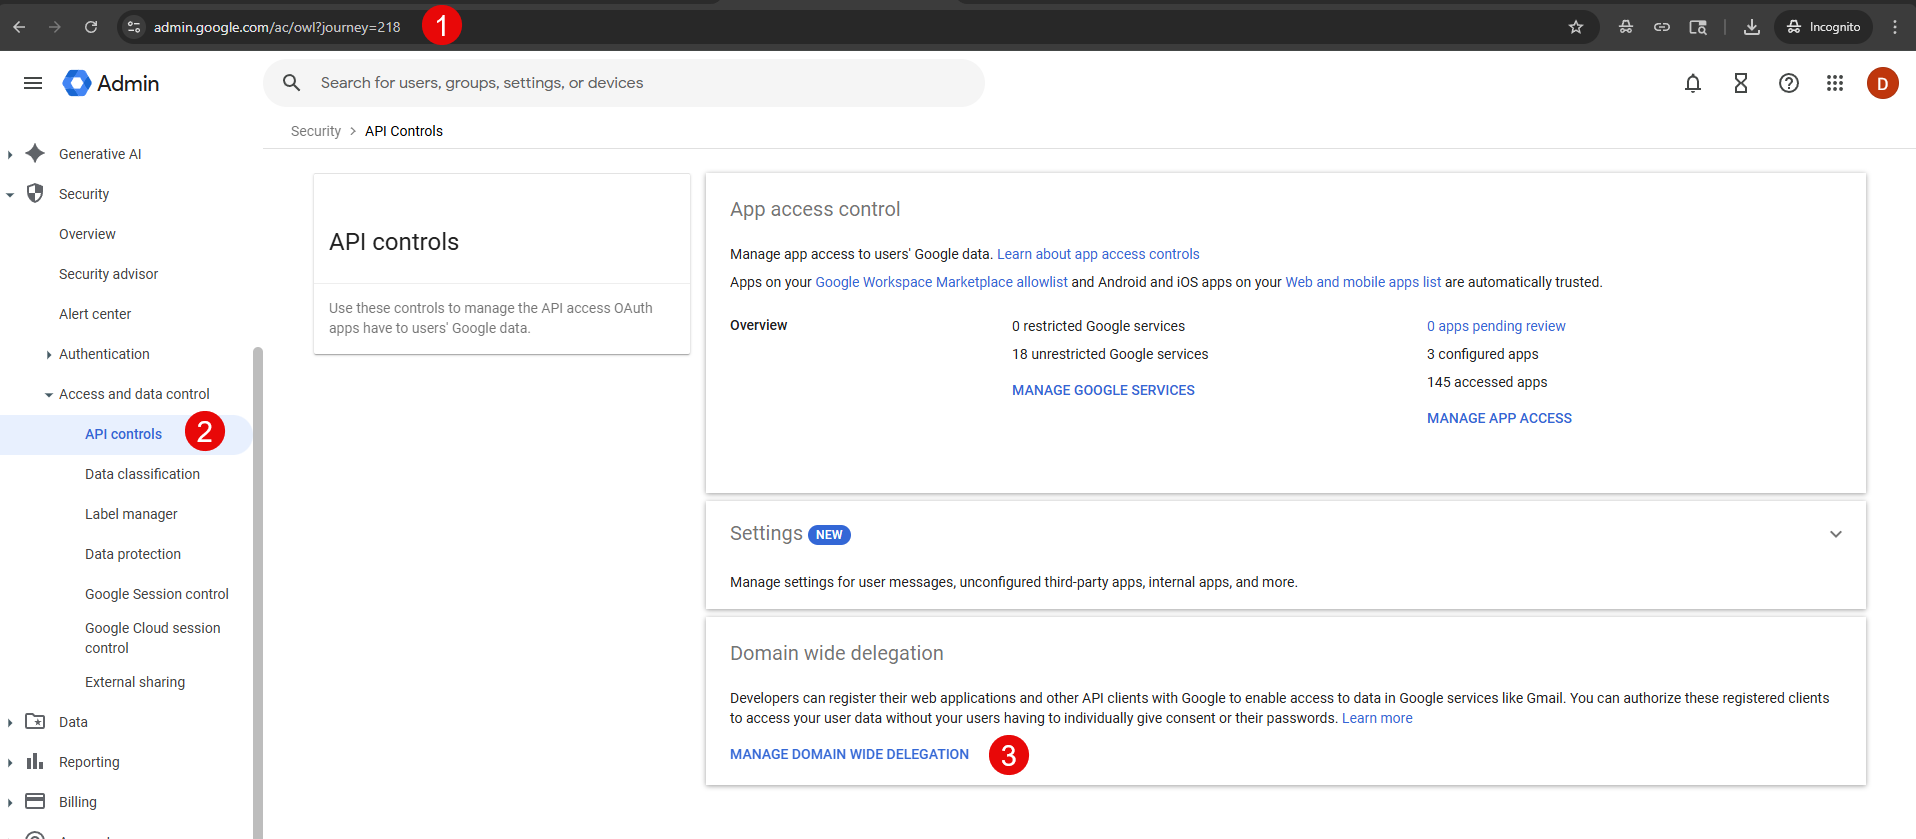
- Google Admin Console: Security > API Controls > Domain-Wide Delegation